Research

I had the opportunity to teach a two day HemoSpat course at the Canadian Police College (CPC) this past week. Last year, Sgt. Jennifer Barnes, a HemoSpat user from the Royal Canadian Mounted Police (RCMP), contacted me and asked if I ever put on HemoSpat workshops. This conversation evolved into the creation of a two day class organized by Sgt. Beverly Zaporozan the Forensic Identification Training Coordinator at CPC. She did a fantastic job organizing everything so it all ran smoothly.

We had fourteen students from across Canada and the US. They came from five different organizations: several RCMP National Forensic Identification Support Services sections, the Edmonton Police Service, the Toronto Police Service, the Waterloo Regional Police Service, the Vancouver Police Department, and the US Naval Criminal Investigative Service (NCIS) were all represented.

The course had both classroom and practical components. The lecture part covered scene documentation extensively – both surface and pattern – along with a review of key concepts and sections on how HemoSpat works under the hood, 3D exporters, working with laser scanner point clouds, and some cast-off pattern research.

Over the course of two days, the students documented and analyzed two scenarios – the first consisted of multiple impacts using “regular surfaces”:
CPC HemoSpat Course - Scenario 1

CPC HemoSpat Course – Scenario 1

The second one had multiple angled surfaces – a sloped ceiling and a cabinet in the corner – and multiple impacts:
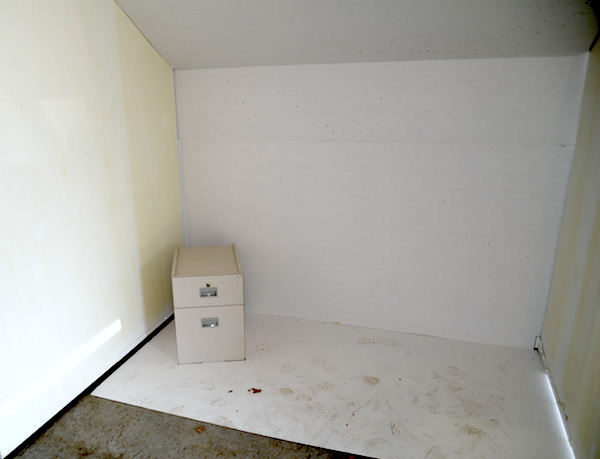
CPC HemoSpat Course - Scenario 2

CPC HemoSpat Course – Scenario 2

One of the areas we focused on was the use of the new Reference Image and Point Select tool from HemoSpat 1.8. This allows the analyst to photograph groups of stains and do stain selection in HemoSpat.
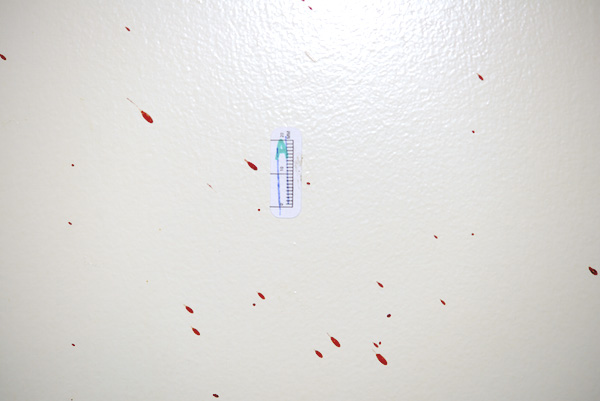
CPC HemoSpat Course - Reference Image Example

CPC HemoSpat Course – Reference Image Example
Any stains in this image may be used for analysis

This sped up the documentation process dramatically. It was also interesting to note that, as a result of the new technique, the analysts tended to work with more bloodstains than they normally would.

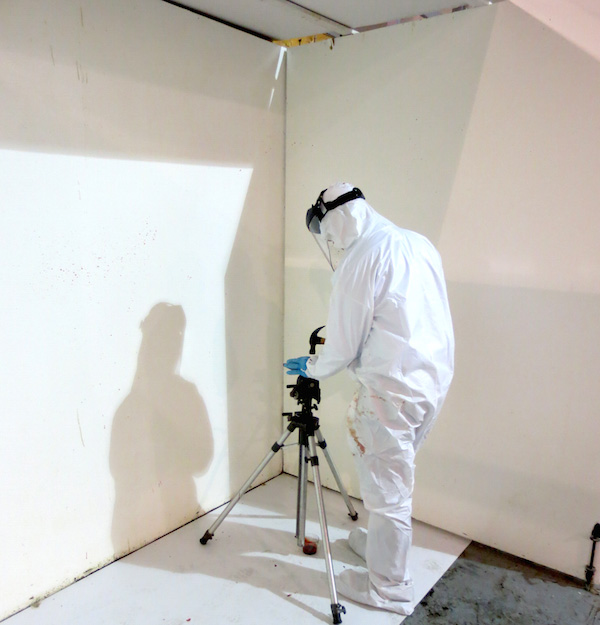
Staff Sgt. Gord Lefebvre of the Ontario Provincial Police (OPP) provided invaluable assistance – creating the patterns, teaching part of the pattern documentation section of the course, and answering questions in the hands-on documentation and analysis parts.
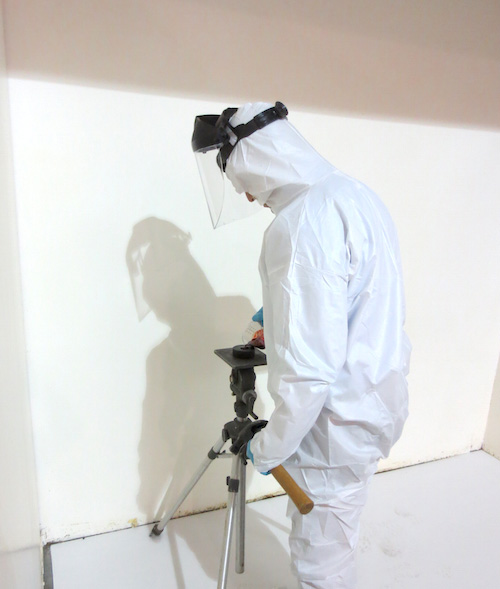
CPC HemoSpat Course - Gord Creating An Impact Pattern

CPC HemoSpat Course – Gord Creating An Impact Pattern

The feedback from the students was overwhelmingly positive so I hope I will have the opportunity to teach the course again and that we can open up the registration to other organizations.
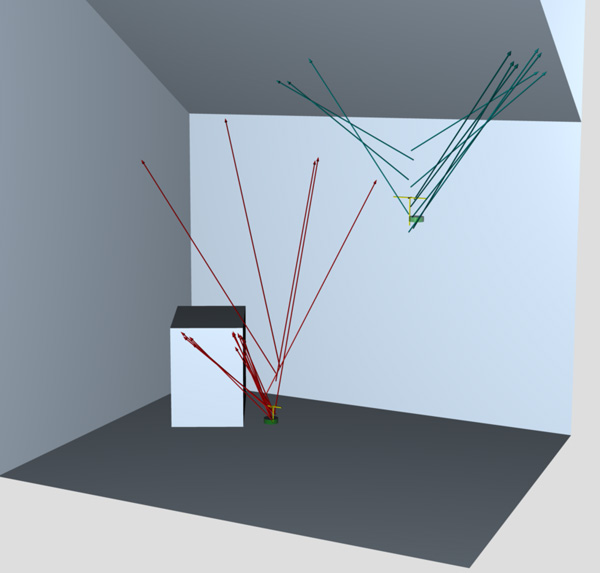
CPC HemoSpat Course - Scenario Analyzed

CPC HemoSpat Course – Scenario Analyzed
Exported in 3D and displayed using Apple Preview

We collected all the data – photographs and location documentation – from the six experiments (three groups, two scenarios each). If any HemoSpat users are interested in downloading this data, please contact me.

A few weeks ago I had the opportunity to work with some of the bloodstain pattern analysts (BPAs) in my area. Staff Sgt. Gord Lefebvre of the Ontario Provincial Police (OPP) had approached me to see if we could get together to go over some of the features of HemoSpat. He arranged some space for us at the Canadian Police College (CPC) here in Ottawa to run an impact pattern workshop.

I know some other BPAs in the area, so I invited them to join us. We ended up with analysts from the OPP, Ottawa Police Service, and the Service de Police de la ville de Gatineau. The goal of the workshop was to create an impact pattern with multiple non-orthogonal surfaces, document it, analyze it with HemoSpat, and finally to go over the export capabilities to work with the data in 3D.

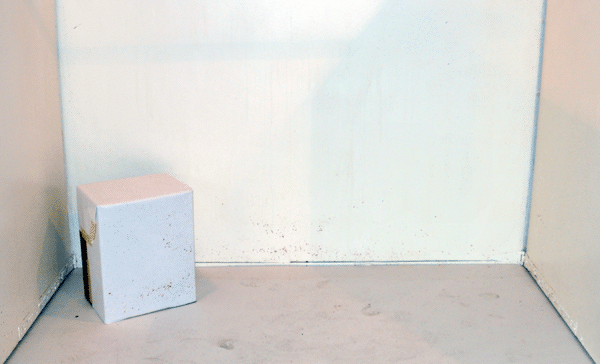
We placed a box in a corner and covered it with paper and placed cardboard on the floor.

CPC Bloodstain Workshop - Setup

CPC Bloodstain Workshop – Setup

Gord suited up and created a pattern with one blow of a hammer close to the floor. Ugo Garneau (Ottawa), Vince Brideau (Gatineau), and Rob Lamarche (OPP) helped with stain selection and documentation, while Gord took the photographs.

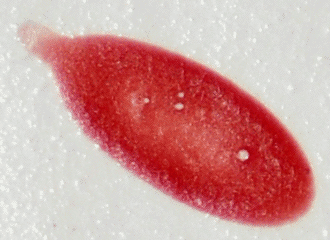
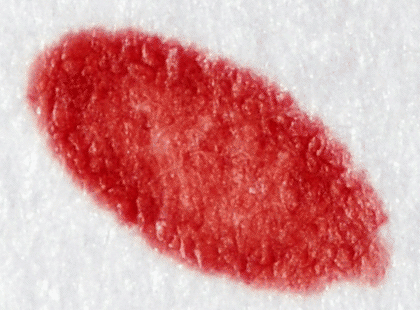
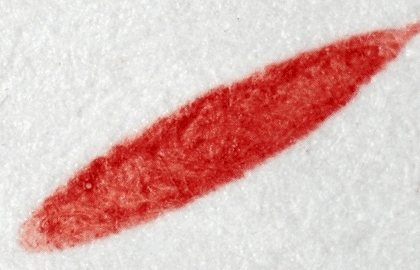
When looking over the stains which were selected, one of the things that really stood out for me was the difference in quality of bloodstains on the three surfaces: the painted wall, the paper on the box, and the cardboard on the floor. Each of the surfaces interacted with the blood a bit differently.

On the painted surface, the impact of the blood resulted in well-formed edges.

CPC Bloodstain Workshop - Bloodstain On Wall

CPC Bloodstain Workshop – Bloodstain On Wall

The paper and cardboard each absorbed some of the blood and resulted in some wicking into the material. This shows how important it is for the analyst to understand the mechanisms of bloodstain formation in order to fit ellipses properly during analysis.

CPC Bloodstain Workshop - Bloodstain On Paper

CPC Bloodstain Workshop – Bloodstain On Paper
CPC Bloodstain Workshop - Bloodstain On Cardboard

CPC Bloodstain Workshop – Bloodstain On Cardboard

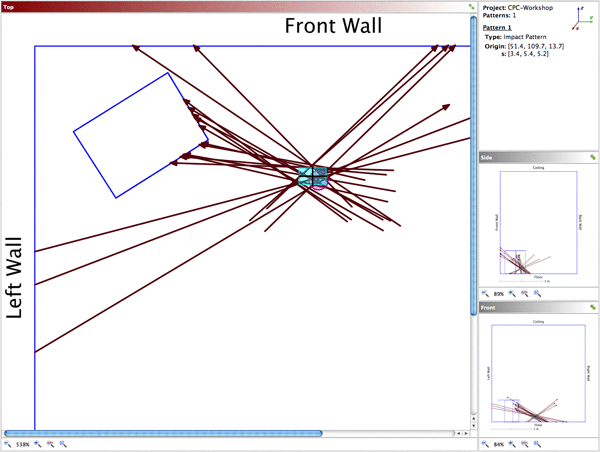
It was also interesting to note during analysis that using only bloodstains from the box resulted in a large standard deviation in the result. Adding in the stains from the wall and floor really tightened up the result. The final results of the analysis were quite good:

CPC Bloodstain Workshop - Impact Pattern 2D

CPC Bloodstain Workshop – Impact Pattern 2D
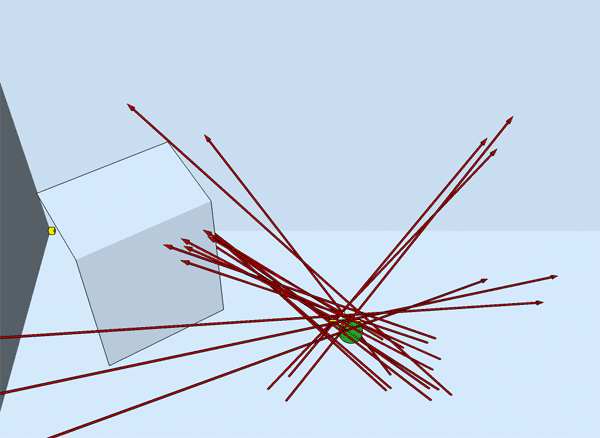
CPC Bloodstain Workshop - Impact Pattern 3D

CPC Bloodstain Workshop – Impact Pattern 3D

It was a very useful and productive day! Thanks to Gord for arranging things and to Ugo, Vince, and Rob for coming out, asking some good questions, and giving feedback. Special thanks to Doug Morris and Julie Goulet of the Royal Canadian Mounted Police (RCMP) who provided us with the training area at CPC.

Association for Crime Scene Reconstruction

An Introduction to Building 3D Crime Scene Models Using SketchUp, an article which I co-authored with Elissa St. Clair (Naval Criminal Investigative Service) and Albert Schade (Berks County District Attorney’s Office, Forensic Services Unit), was published in the Fall 2012 Journal of the Association for Crime Scene Reconstruction.

The purpose of the article is to try to encourage those doing crime scene reconstruction work to consider SketchUp as a tool due to its ease-of-use, affordability (free!), and the wealth of models available in the 3D Warehouse. With SketchUp, it is possible to get a reasonable 3D model from a 2D crime scene sketch without being a professional modeller or spending months learning the tools.

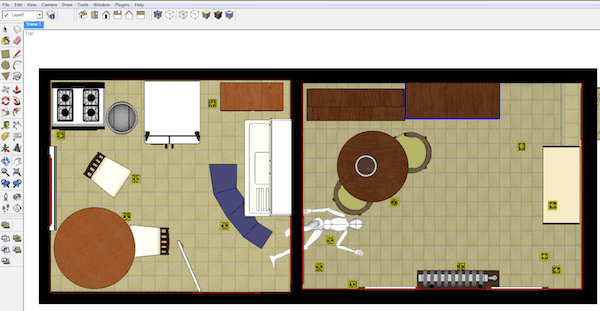
ACSR - St. Clair, Maloney, Schade - SketchUp Crime Scene - No Perspective

A Crime Scene In SketchUp (No Perspective)
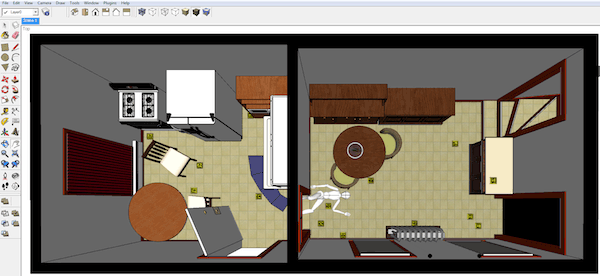
ACSR - St. Clair, Maloney, Schade - SketchUp Crime Scene - With Perspective

A Crime Scene In SketchUp (With Perspective)

In the article we give an example from a real crime scene and show step-by-step how we constructed the 3D model from the 2D sketch. At the end we show the resulting 3D model side-by-side with the crime scene photos.

The abstract of the paper is on our Bloodstain Research page, and the article and supplemental material are also available for download.

If you have any comments or suggestions, please feel free to contact us.

Association for Crime Scene Reconstruction

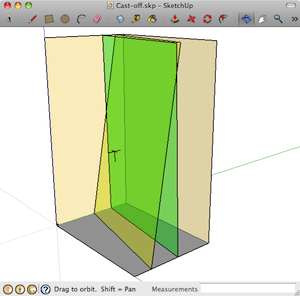
When an investigator encounters a cast-off pattern at a crime scene, they can usually get a sense of the general location and orientation of the swing which created the pattern. This is very difficult to document and almost impossible to demonstrate to others who have not attended the scene.

This research is about trying to find a way to capture that piece of the scene in a way that will let investigators communicate it to others. The article, titled Visualization of Cast-off Patterns Using 3D Modelling Software, was published in the Fall 2011 issue of the Journal of the Association for Crime Scene Reconstruction.

Cast-off Pattern Planes of Motion

Cast-off Pattern Planes of Motion

The abstract of the paper is on our Bloodstain Research page, and the article and supplemental material are also available for download.

If you have any comments or suggestions, please feel free to contact us.

DeWayne Morris of the Illinois State Police (ISP) presented a talk at a recent SWGSTAIN meeting on combining panoramic photography, data exported from HemoSpat, and a 3D model of the scene. The goal is to provide a real-time virtual 3D environment to be used as demonstrative evidence to expert testimony.

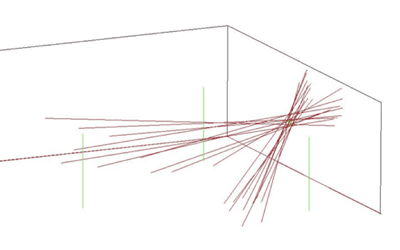
The details of the process are too long to post, but essentially you start with 3D data exported from HemoSpat using the DXF exporter:

ISP - 3D HemoSpat data

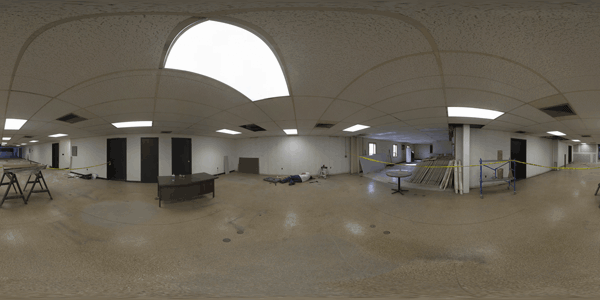
…and a spherical panoramic photo of the crime scene…

ISP - Panoramic crime scene photo

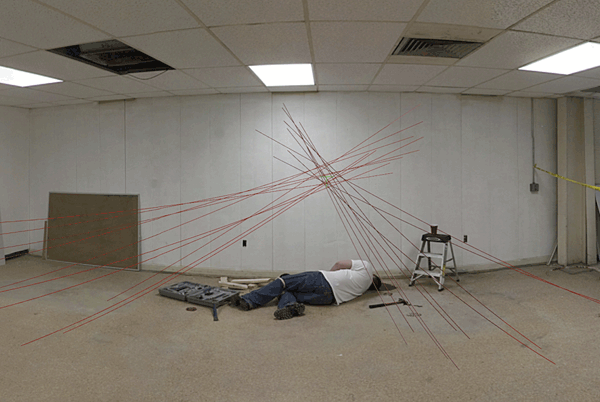
…and then combine them using the 3ds Max modelling software:

ISP - Panoramic crime scene photo with HemoSpat data

Then you can render it as a Quicktime VR movie which lets you navigate the scene as a virtual 3D environment.

I love seeing people do new and interesting things like this! Thanks to DeWayne and the ISP for permission to use the images.