HemoSpat Features
HemoSpat was designed with the user in mind from the very beginning. Here are some of the features which make using HemoSpat for impact pattern analysis unique:
Easy to Use Interface
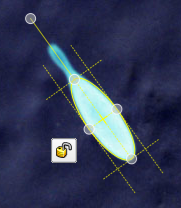
Automatic Bloodstain Ellipse Detection
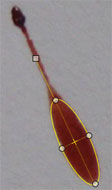
Click on the stain and HemoSpat uses image recognition techniques to approximate the ellipse.
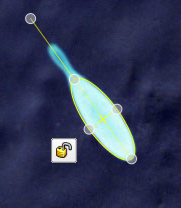
If it needs to be adjusted, use the ellipse control points - a couple of clicks with the mouse and you're done. As the analyst, you maintain control over how the ellipse is fit to the bloodstain.
Ellipse Guidelines
Optional guidelines will show you the box around the ellipse selection to help you fit the ellipse to the bloodstain.
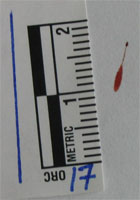
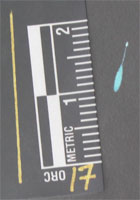
Invert Colours
In order to increase the contrast between the bloodstain and the background, it is sometimes useful to invert the
colours in the image.
Quick Stain Location Entry
Enter your stain names and locations quickly using the
Quick Entry window. On the left, the current working image of the stain you are editing is shown. On the right is the table where you can tab through and quickly modify the name and location data for each stain.
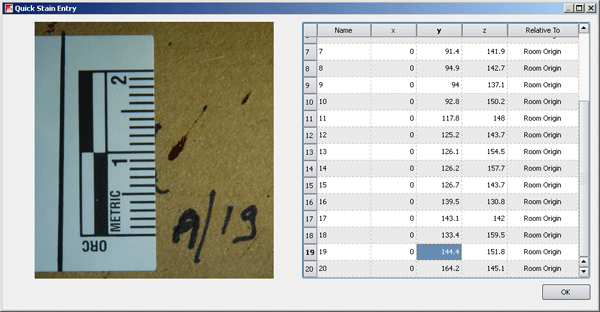
Quick Stain Entry Window
Original Photo Information
Digital cameras often save additional information about the photos, called EXIF data, in the photos themselves. This includes data such as the camera make and model, when the photo was taken, and if the flash was used or not. With HemoSpat, you can see this information if it is available.
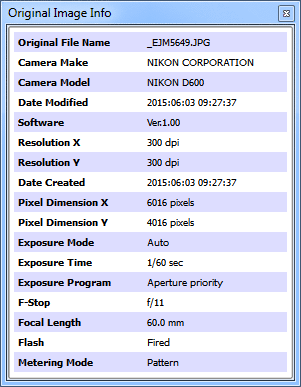
Original Image Information
Save Each Step
HemoSpat saves all the analytical work done by the user. Should you see a problem with one of your strings, it is a simple matter to pull up the individual stain and look at the ellipse, plumb, and scale placement. This also allows for a proper peer evaluation because the evaluator will be able to see all the work that went into generating the final result.
Drag & Drop To Manage Images and Bloodstain Patterns
HemoSpat supports the analysis of more than one pattern at a time and includes several ways to import your digital images into the project.
Simply drag your images to the window to add it to a pattern or create a new one.
Moving stains between patterns is as easy as dragging the image from one pattern to the other.
Stain Selection
Once the main stain in a reference photo has been analyzed, you may identify and use any other bloodstain in the photo. This speeds up the documentation process, allows you to use more stains, and allows peer review of the stain selection process.
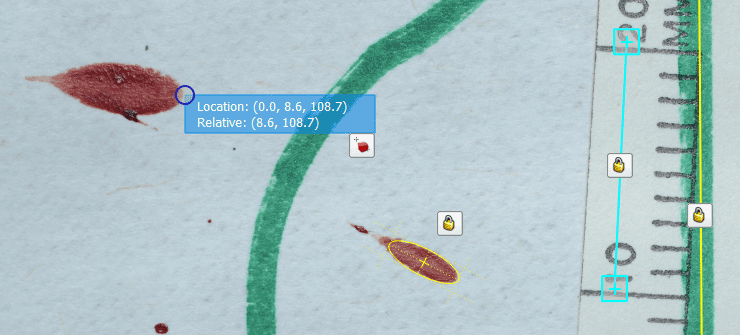
HemoSpat stain selection using the point select tool
Analyze Angled (Non-orthogonal) Surfaces
HemoSpat has an easy-to-use surface editor that allows you add any flat (planar) surface to the scene for your analysis.
These surfaces may be exported to your crime scene reconstruction software to give you a framework to start from or
to double-check that everything lines up properly in your model.
![HemoSpat data imported into Preview [Mac OS X] HemoSpat data imported into Preview [Mac OS X]](https://hemospat.com/images/features/angled_surfaces.png)
HemoSpat data imported into
Preview on Mac OS X
Use Relative Locations
To make the measurement of stain locations on angled surfaces easier, HemoSpat introduced the concept of relative stain locations. This allows you to measure the stain locations relative to the surface's bottom-left corner, greatly simplifying the documentation process and saving you a lot of time.
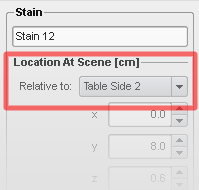
Relative stain location entry
Real-time Area of Origin Calculation
The area of origin is calculated in real time for each pattern. This means that as you change your stain data, the origin is automatically recalculated and the 2D views updated. Export the data at any time to see a snapshot in 3D.
![HemoSpat data imported into SketchUp [Mac OS X] HemoSpat data imported into SketchUp [Mac OS X]](https://hemospat.com/images/features/dae_sketchup.png)
HemoSpat data imported into
SketchUp on Mac OS X
Area of origin is indicated - tangent lines for the impact spatter are not shown
![HemoSpat data imported into AutoCAD [Windows XP] HemoSpat data imported into AutoCAD [Windows XP]](https://hemospat.com/images/features/AutoCAD.png)
HemoSpat data imported into
AutoCAD on Windows XP
Area of origin is indicated in green
Use Experiment Mode
If you are conducting an experiment and you know the origin of the impact pattern, turning on
Experiment Mode lets you specify the known origin for the impact pattern. HemoSpat will use this to calculate and display the delta against the calculated origin.
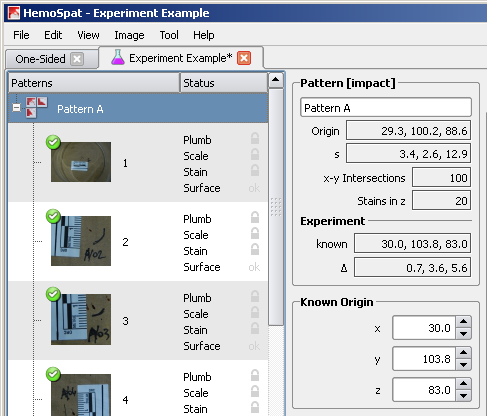
Experiment mode
The known origin is optionally included when using HemoSpat's 2D Viewer.
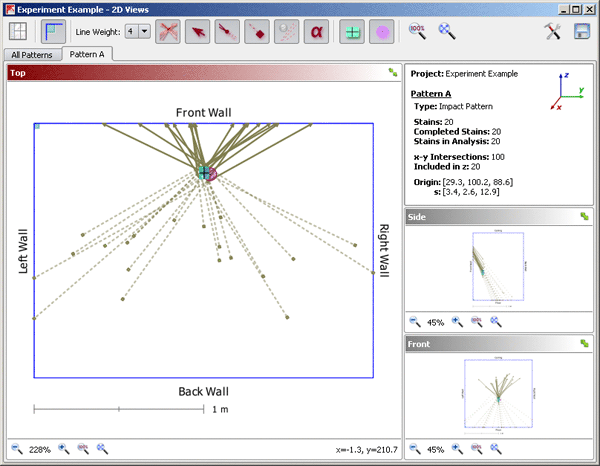
Known origin indicated in HemoSpat's 2D Viewer
If you export to any of the 3D formats to view your scene in Apple Preview or SketchUp, you can include the known origin in the 3D diagram as well.
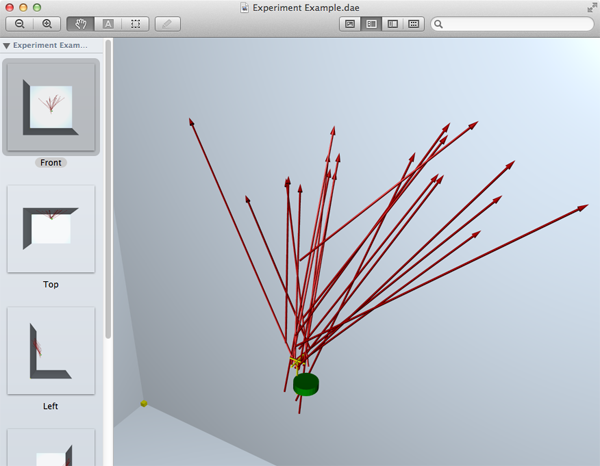
Known origin indicated in COLLADA file - viewed with Apple Preview
Export Your Data
HemoSpat stores its data and the analysis in the project. It is, however,
your data and you should be able to use it however you like.
You should not have to manually enter this data again into other software for further analysis.
Your data may be exported in various formats for reports, directional analysis using other software, or for use in crime scene reconstruction.
HemoSpat exports to several formats:
- .csv for input into spreadsheets such as OpenOffice.org Calc, Gnumeric, or Microsoft Excel
- .dae for input into Apple's Preview, SketchUp, MapScenes*, IMS Map360*, or any other 3D asset software
- .dxf for input into AutoCAD, ScenePD, MapScenes*, IMS Map360*, or almost any other CAD software
- .obj for use with CloudCompare, MeshLab, and most other 3D modelling tools
- .txt a basic report generated by HemoSpat itself
- .wrl (VRML) for import into Blender or other 3D modelling software which supports this older format
![HemoSpat data imported into Preview.app [Mac OS X 10.7] HemoSpat data imported into Preview.app [Mac OS X 10.7]](https://hemospat.com/images/features/dae_preview.png)
HemoSpat data imported into
Preview on Mac OS X 10.7
We can also provide custom exporters for other formats if the details of the format are available.
Integrate With Point Clouds
HemoSpat provides tutorials on how to integrate your bloodstain pattern data with point clouds using software such as
CloudCompare and
IMS Map360.
![HemoSpat data imported into CloudCompare [Mac OS X 10.6] HemoSpat data imported into CloudCompare [Mac OS X 10.6]](https://hemospat.com/images/features/CloudCompare_Point_Cloud_Example.png)
HemoSpat data imported into
CloudCompare on Mac OS X 10.6
![HemoSpat data imported into IMS Map360 [Windows 7] HemoSpat data imported into IMS Map360 [Windows 7]](https://hemospat.com/images/features/IMS_Example.png)
HemoSpat data imported into
IMS Map360 [Windows 7]
Integrate With Other 3D Software
HemoSpat also provides tools and tutorials to integrate your bloodstain pattern data with other 3D software such as
SketchUp.
![HemoSpat data imported into SketchUp [Mac OS X] HemoSpat data imported into SketchUp [Mac OS X]](https://hemospat.com/images/features/dae_sketchup_example.png)
HemoSpat data imported into a simple room using
SketchUp on Mac OS X 10.6
Document The Crime Scene
Choose Your Coordinate System
Traditionally, the 3D coordinate system used in the field of bloodstain pattern analysis to record bloodstain locations is the right-handed coordinate system.
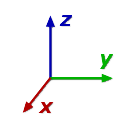
Right-handed Coordinate System
For some people, however, the 'x' and 'y' axes seem "backwards" because they visualize 3D space in terms of the left-hand coordinate system.
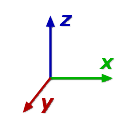
Left-handed Coordinate System
HemoSpat lets you choose which coordinate system you want to use.
Data Forms
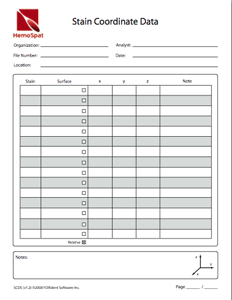
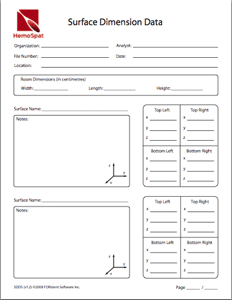
We provide forms to be used at the crime scene for recording bloodstain location information and surface information. They are laid out according to how the data is input into HemoSpat when analyzing a scene. These may also be filed with your case paperwork for future reference.
Work On Your Platform
HemoSpat is
available for macOS 11-13 (64-bit Intel), and Windows 10/11.


![HemoSpat data imported into Preview [Mac OS X] HemoSpat data imported into Preview [Mac OS X]](https://hemospat.com/images/features/angled_surfaces.png)

![HemoSpat data imported into SketchUp [Mac OS X] HemoSpat data imported into SketchUp [Mac OS X]](https://hemospat.com/images/features/dae_sketchup.png)
![HemoSpat data imported into AutoCAD [Windows XP] HemoSpat data imported into AutoCAD [Windows XP]](https://hemospat.com/images/features/AutoCAD.png)


![Export menu [Mac OS X] Export menu](https://hemospat.com/images/features/exporter_menu.jpg)
![HemoSpat data imported into Preview.app [Mac OS X 10.7] HemoSpat data imported into Preview.app [Mac OS X 10.7]](https://hemospat.com/images/features/dae_preview.png)
![HemoSpat data imported into CloudCompare [Mac OS X 10.6] HemoSpat data imported into CloudCompare [Mac OS X 10.6]](https://hemospat.com/images/features/CloudCompare_Point_Cloud_Example.png)
![HemoSpat data imported into IMS Map360 [Windows 7] HemoSpat data imported into IMS Map360 [Windows 7]](https://hemospat.com/images/features/IMS_Example.png)
![HemoSpat data imported into SketchUp [Mac OS X] HemoSpat data imported into SketchUp [Mac OS X]](https://hemospat.com/images/features/dae_sketchup_example.png)


