HemoSpat version 1.8 introduced the capability to do stain selection within HemoSpat. Using reference images, the user analyzes one stain in the image and the Point Select tool allows the analysis of any other stain in the image very quickly.
This process has several benefits:
- it speeds up the documentation process dramatically
- it encourages the use of more stains for an analysis
- it allows peer review of the stain selection process
In June 2015 I had the opportunity to teach a HemoSpat course at the Canadian Police College (CPC). We used HemoSpat version 1.8 and focused on using the new stain selection technique. It was clear that documenting the scene was a lot faster and that the analysts tended to use more stains in their analysis of the impact patterns. Overall it was a great validation of the process.
This was also a great opportunity for me to see the new feature in action – what worked, what didn’t, and what could be improved. I used this information along with feedback from the class in order to fine tune the process. HemoSpat version 1.9 introduces these refinements to make the process clearer and more streamlined.
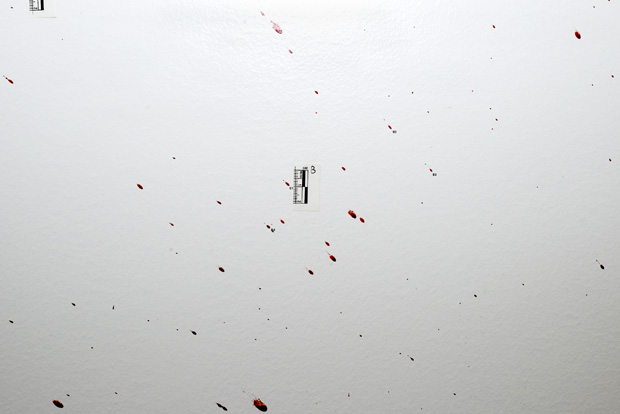
In this article I will outline the process of documenting and analyzing stains using the new Point Select tool.
Documentation
When you’ve identified an impact pattern at the scene you want to document & analyze, the first thing to do is to identity groups of stains that you want to work with and pick one stain in that group to be the reference stain. Choose a labelling scheme to use for the stain groups. All teams on the CPC course used letters for the stain groups and one team included the surface identifier in the name. Here’s an example of the cabinet showing multiple stain groups:
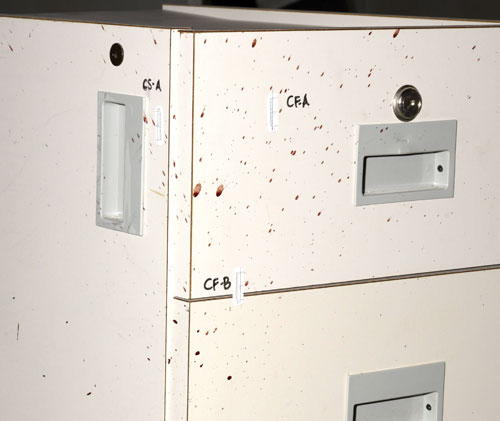
In this image CF-A was “Cabinet Front Group A”, CF-B was “Cabinet Front Group B”, and CS-A was “Cabinet Side Group A”. Labelling stain groups this way has the useful property that whenever you look at an image of a stain group, you know which surface it is based on the identifier.
Whatever labelling scheme you choose, make sure it’s consistent and that the identifier is unique to the crime scene.
For this example, we’ll use stain group “G” from the Front Wall of the scene:
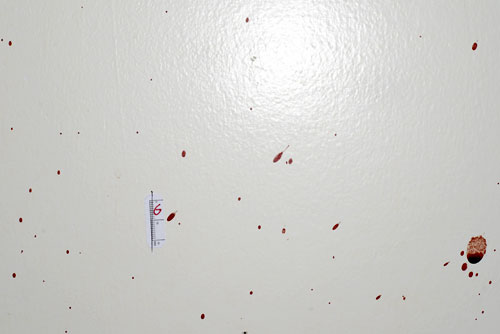
Even with this smaller version of the image you can see there are several stains that are great candidates for analysis. The reference stain in this image is the one next to the scale with the middle line pointing at it. The plumb line was marked and the location of the reference stain recorded:
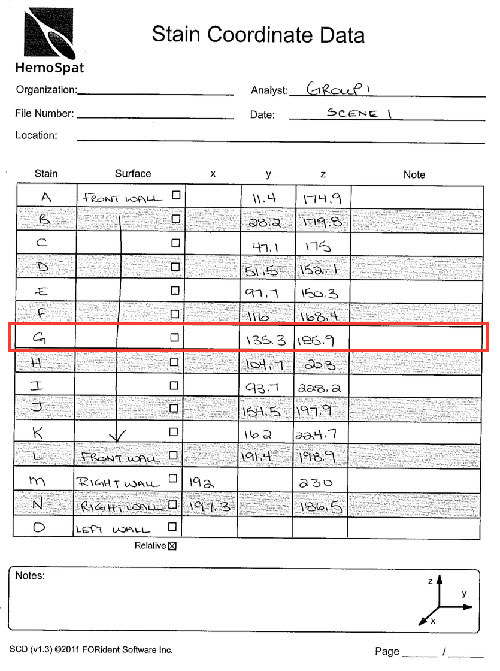
That’s all the information we need in order to use any stains from this reference image. Let’s take a look at how to analyze one.
Analysis
The first thing to do is bring the images in and analyze the reference stains just as you normally would:
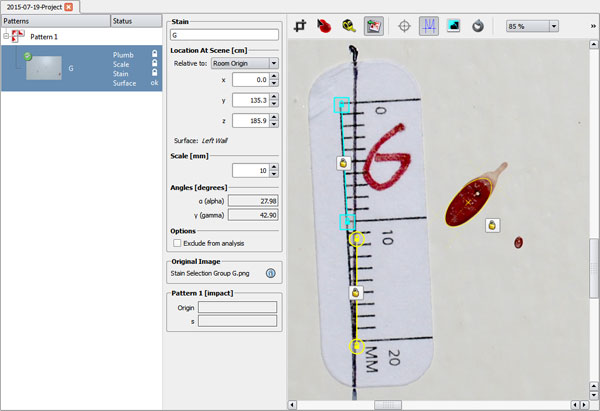
Now that reference stain “G” is fully analyzed, the Point Select tool is active in the toolbar. It looks like this:
Select this tool, place the crosshairs over the leading edge of the next stain you want to analyze, and click the mouse.
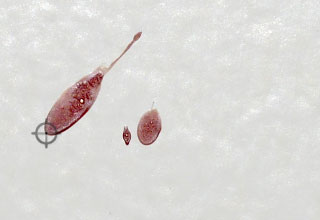
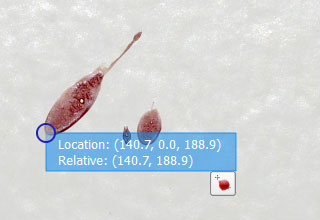
The information box shows us the location of the point in two different ways: relative to the room’s origin and relative to the surface’s bottom-left corner.
The button in the bottom-right corner lets us create a new stain from this information. Clicking it copies all of the reference stain’s data except the ellipse and the location to a new stain. The new stain is named based on the reference stain’s name (in this case the new stain becomes “G_1 *” – the * is just an extra indicator that it is a point-selected stain).
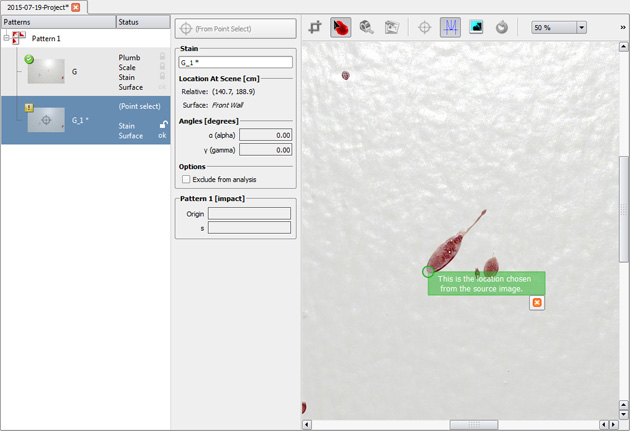
You’ll notice that there are a couple of indicators that the current stain was created through point selection: the stain editing area changes to prevent changing the stain’s location and scale, it says (From Point Select) at the top, the thumbnail image has the point select image in the middle of it, and the scale and plumb locks next to the thumbnail are gone.
The location of the new stain is filled in with the information that was calculated, so the only thing left to do is to fit the ellipse!
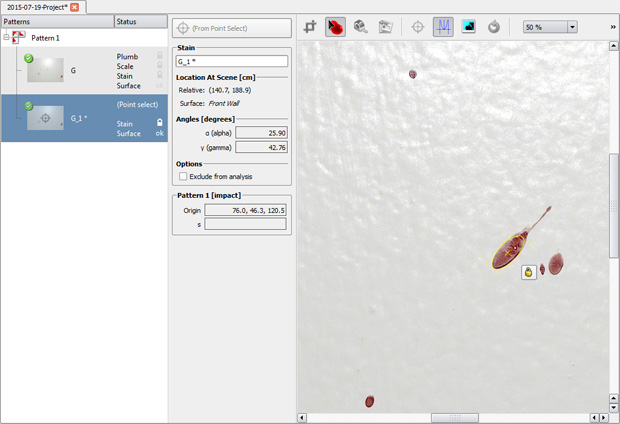
Repeat this process for any stains you want to include from this reference image, and then do this for each reference image. You can use as many stains as you like from each reference image.
Conclusion
I hope you find this new feature saves you time and makes it easier to document and analyze impact patterns.
If you need more information about documenting bloodstains for use with stain selection in HemoSpat, there is more information included in the manual, or you can contact support.
